

Overview:

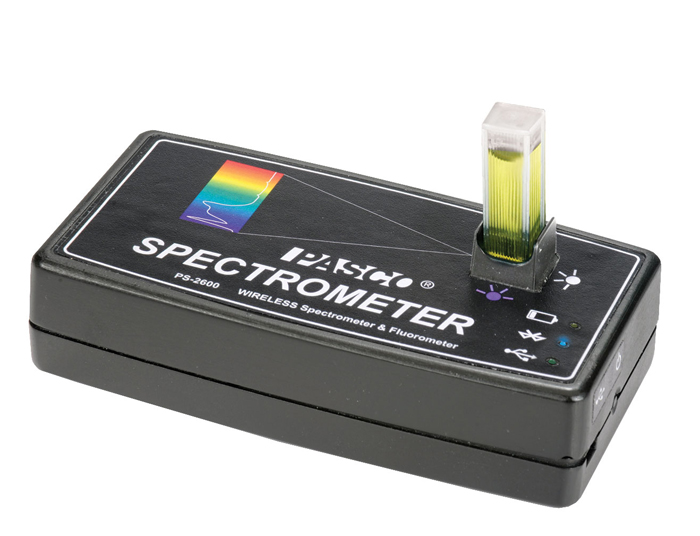
A USB spectrometer measures light that passes through a solution in the cuvette.
Students explore how different materials absorb and emit light, then measure spectra with a desktop spectrometer.
Essential Question:
How do we measure the absorption and emission of light?
Background:

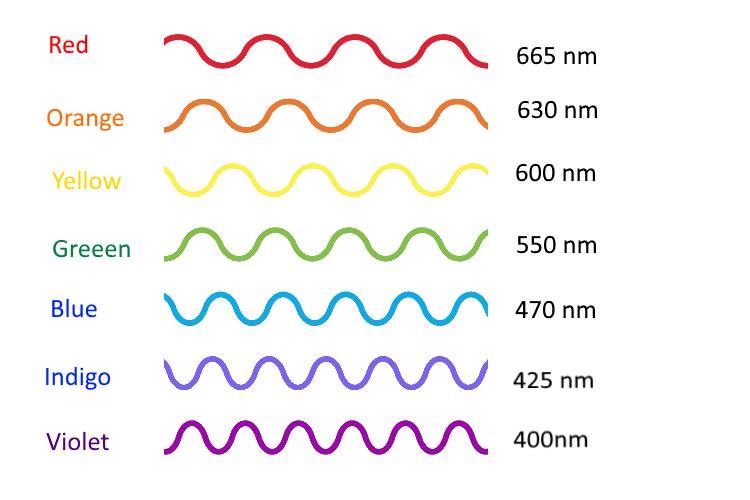
Light travels from here to there like a really fast bullet. When we see a light turn on, there are particles of light called photons that travel from the lamp to your eye. Light goes so fast that in one second, light travels 180,000 miles! That’s traveling across the US 72 times in one second! All light is made of photons, when a lot of these photons travel together it looks like a wave. Color of light is related to the length of the wave called a wavelength. Red light has long wavelengths about 700 nanometers, while blue light has shorter waves of about 400 nanometers. White light is the result of mixing all the colors of the spectrum, different light particles with different wavelengths.
Light interacts with matter in a several ways and can be changed by the interaction. A lightbulb, a flame, or the sun emit light of various colors. Emission is the creation of light by a chemical reaction (phosphorescence), heat (incandescence) or electrical or light excitation (fluorescence). When light hits an object it can be absorbed, reflected or transmitted. When light passes through a partially transparent color filter certain colors will be absorbed while others are not. A spectrometer is a device that can measure the absorption and emission spectra different materials. Astronomers can use a spectrum of a distant star in order to figure out what sorts of gases are in the star! That’s how we know what a star is made of, even if we can never go there. We just take spectra of gases here on earth and compare to the spectra of the stars.
Fluorescence is an important physical phenomenon in which light is absorbed at one wavelength, and then light is emitted from the material at a longer wavelength (lower energy). It naturally occurs in some minerals and biological organisms such as marine fish. This principle has many applications including fluorescent lights, white LEDs, analytical chemistry, microscopy, forensics, parts inspection, high-visibility clothing, and more.
Research Connection: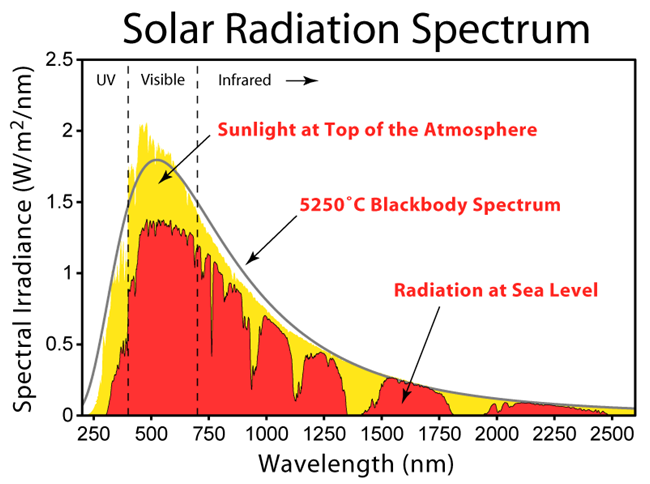
One of the most common measurements that chemists make is the absorption and emission spectra. CEI researchers are attempting to tune materials so that they can absorb light in a desirable part of the spectrum and sometime re-emit it at a different spectrum. This will allow solar materials to become more efficient. This lab uses a desktop USB spectrometer to make these measurements. The spectrometer is one of the most widely used instrument in an advanced materials laboratory. Researchers spend much of their time manipulating chemicals and materials so they absorb or emit light in way that is needed for a device. It is desirable for solar cells to absorb all wavelengths of light so they can make full use of the solar spectrum. Similarly LEDs can be adjusted so they emit light that matches our needs. Fluorescent materials are being invented that can absorb light in one color and then re-emit it at another color where solar cell can use the energy. It can also be used in luminescent solar concentrators to improve the efficiency of solar cells.
NGSS Standards:
| Standard Number | Standard text |
| MS-PS4-2 | Develop and use a model to describe that waves are reflected, absorbed, or transmitted through various materials. |
| 4-PS3-2 | Make observations to provide evidence that energy can be transferred from place to place by sound, light, heat, and electric currents. |
Materials:
- Color filter
- Flashlight, LED, Incandescent, UV, other.
- USB spectrometer (ie Pasco ps-2600)
- Food coloring
- Water based Fluorescent marking pens
- Tonic water containing quinine
Procedure:
- Model waves with a slinky. You can generate a standing wave with a slinky by holding one end and moving the other end up and down to create a transverse wave. Now, move the Slinky slowly to generate long wavelengths and tell students to observe closely, then make waves of much shorter wavelength by moving the Slinky very quickly. (Be sure to move the Slinky approximately the same distance each time so that the waves all have about the same height.) (Because of the springy nature of a slinky you can also show a longitudinal wave by rapidly pushing and pulling on the stretched spring. This is similar to the compressional wave in air that causes sound. Unlike this compressional wave the wave of light does not require a medium to be transmitted, it shines easily through a complete vacuum)
- Where is the peak of the wave? (Have a student point to the peak.)
- Where are the nodes, places that don’t move? (Again, have a student point it out.)
- If we were going to measure the wavelength of this wave, where would we measure? (From one peak to the next.)
- Use a ruler to actually measure the wavelength.
- Which waves (short or long) appear to have more energy? What conclusions can you draw from this demonstration?
- What is a spectrum? A spectrum of light tells you how much light there is of each different wavelength.
- Draw a graph with wavelength on the x axis and power on the y axis. Label the colors (630 nm = red, etc…) Show a red light and demonstrate what the spectrum would look like.
- What would a blue light look like?
- What about a yellow light?
- White light from the sun has a pretty even distribution of every color.
- White light from a computer monitor shown below has several spikes because of the particular chemicals used in the LED phosphors. This is called an emission spectrum.
- Filters- What happens when a filter is placed in white light. The filter subtracts some light and lets other light through. A red looking filter absorbs everything but red. Hold a color filter over your eye and look around.
- Which objects appear bright, and which appear dark?
- If we started with white light, which filter would we need to make blue light?
- What wavelengths of light does that filter remove? What would the absorption spectrum look like?
- Measure absorption spectra with a spectrometer. Now open up the mini-spectrometer, connect the USB to the computer and open the spectrometer software on the computer.
- Measuring emission spectra with a spectrometer. Connect the fiber optic attachment and direct it towards different light sources to see whether our predictions were correct. Now, put the spectrometer in a cardboard box so the students don’t know which type of light is being collected. Hold up different lamps to the spectrometer and have the students identify which kind of light it is. There are a few common types of bulbs. A florescent bulb, incandescent and an LED bulb all look white, but their spectra are very different. Draw these spectra out on the board. The students were (hopefully!) able to identify the source of the light just from its spectrum.

- Measuring fluorescent spectra with a spectrometer. One way to characterize fluorescence is with a fluorometer. This device excites the material with light of one or more wavelengths and then measures the emitted light from the sample. An example of such a characterization is shown below. When the sample is excited with 405 nm light (violet), it fluoresces at 512 nm (green). This change in wavelengths, referred to as the Stokes shift, is due to energy loss between the absorbed and emitted photons (quanta of light).
Resources
Absorption and Fluoresence Lesson
http://sciencenetlinks.com/lessons/light-2-the-lighter-side-of-color/