

Solar Spinner
Build a device from a solar cell, motor and petri dish. It demonstrates conversion of solar energy to electricity and then to mechanical energy.
QUESTION
How do we build a toy that uses solar energy to make it spin?
Background
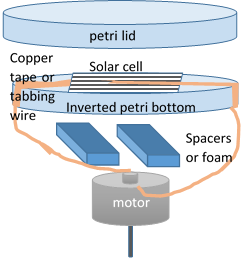
The front of the solar cell is connected to one wire of the motor, and the back is connected to the other. This makes a complete circuit. It is very important not to let the leads that come from the top of cell to touch the tape coming from the bottom of the cell because this would cause a short circuit. It is important make a good contact between the cell and then wires to decrease the resistance to the flow of electricity. This project uses a thin brittle silicon solar cell which is very easy to break if uneven pressure is exerted on it. The sequence of instructions described below minimizes the risk of flexing the cell. Using conductive copper tape is easier, however not as durable as solar tabbing wire. You can also buy encapsulated solar cell with wires attached which are more expensive but easier to construct. The solar spinner can be embellished with decorations or blades to make it a STEAM (science technology engineering ART and math) artifact. Imagine a yard full of solar spinners that come alive as the sun moves across the sky.

Research Connection
Researchers are developing with new materials and designs for solar cells to make them more efficient, decrease cost, and make us of earth abundant and non polluting materials.
NGSS Standards
| Standard Number | Standard text |
| 4-PS3-2 | Make observations to provide evidence that energy can be transferred from place to place by sound, light, heat, and electric currents. |
| 4-PS3-4 | Apply scientific ideas to design, test, and refine a device that converts energy from one form to another.* |
| MS-PS2-3 | Ask questions about data to determine the factors that affect the strength of electric and magnetic forces. |
Materials
- Solar Cell
- Dc Motor
- 100 mm Petri Dish
- Foam Adhesive Tape
- Conductive Adhesive Copper Tape
- Clear Plastic Tape
- Soldering Iron, Non-lead Solder and Tabbing Wire (if doing soldered version)
Procedure
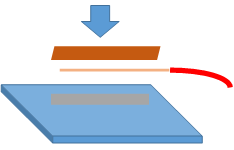
- To attach the encapsulated solar panel to the motor tape the bare ends of the motor wires to the copper strips on the back of the panel.
- Press firmly to be sure there is wire to copper contact. Attach the motor directly to the back of the panel with foam tape.
- Place one side of a petri dish over the panel to protect the cell form the elements.
- Support the spinner on a toy wheel or by pressing the shaft into a piece of wood.
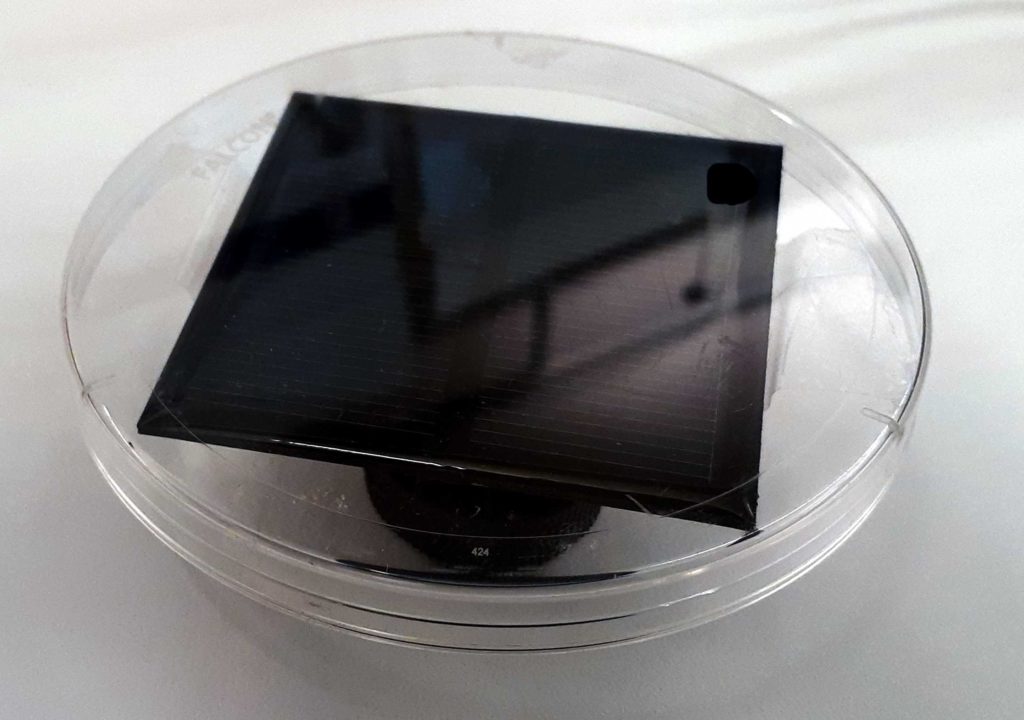
Alternate Instructions Using the Unencapsulated Solar Panel
- The solar cell should fit completely inside the large petri dish lid without touching at the corners. The 38x52mm cells fit without cutting, the larger 75 x 52mm cells require trimming. To trim carefully extend the corner over a sharp table edge and push down to snap off each of the corners of the cell. Unmounted solar cells are just like thin glass so be sure to wear goggles when breaking.
- Cut two 1”x ½” pieces of double sticky foam tape. Place the two strips near the center of the inside of the smaller dish (what would normally be the bottom of the dish) with a small gap between them. Peel off the protective coat and position motor exactly in the center. Press hard to make strong connection.
- Cut two 2” strips of ¼” copper tape and apply to the stripped end of motor wires. On a very flat surface carefully rub down the tape and wire so that it makes full contact with the contact strip on the back of the cell. Be careful not to let the top and bottom tapes touch causing a short circuit. Connect the red or positive wire to the back of the cell to make the spinner turn clockwise.
- Center the cell in on the inverted petri dish with the top or dark side facing up. Press the wire with copper tape to the top contact strip and gently rub it smooth.
- At this point you should be able to feel the motor shaft turning if you put it in the light. Test your solar cell with a voltmeter. One cell should yield .5 volts.
- Put the lid of the petri dish over the cell and fix it with two small pieces of clear plastic tape.
- Drill a 1/16” hole in a block of wood or the end of stick and press the solar spinner into the whole by the shaft so that the spinner sits level.
- Place the solar spinner in the sun or under a high intensity incandescent light and watch it spin.
- You can and reflective ribbons, blades or other decorations to your invention.
Extensions
Instead of copper tape you could solder the copper tape or use pre-tinned tabbing wire to connect the motor to the solar cell. This makes a more permanent and weather resistant connection. Sand the soldering strips first to clean them and make it easier to solder. Be sure to use lead free solder.
Try fixing your solar spinner to the end of a stick which can be pushed into the ground.
Where to get your materials
- Solar cells
- 50 52x52mm unmounted solar cells (good size for smaller panel- about .50 each in quantity)
- 1V Encapsulated Solar Cell
- Small Electric Motor
- Conductive Foil Tape– ¼”
- 100 mm Plastic Petri Dish
- Plastic wheel for mountain solar spinner
- The motor and solar cell can be purchased together with the Solar Fan Kit.