

Print a Solar Car
Student use their makerspace tools to build a solar car chassis.
QUESTION
How can we use 3D printing to make an experimental solar car?
Background
One of the most popular classroom activities conducted by The Clean Energy Ambassadors has been the solar car derby. Student experiment with different arrangements of solar panels on different car chassis. By the end of a busy event we found our cars were often wrecked. Motors broke loose, leads ripped from motors, and clip leads lost. Also we found students had a great interest in customizing the car beyond what our pre-built chasses allowed. So asked high school intern Robert Winton to design a durable, modular car that we could use for our events and that could be 3D printed at school maker spaces. The SolarModCar was born.

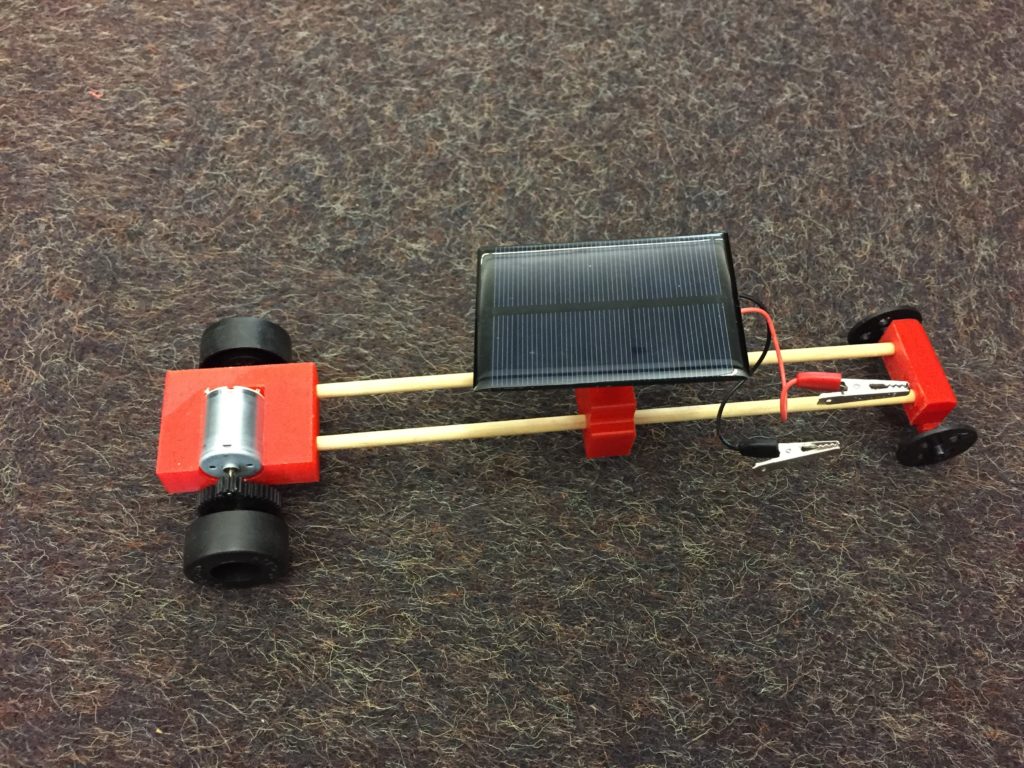
3D printed motor mount, solar cell mount, and front wheel assembly are held together by dowels.
Research Connection
Researchers are making new energy generation and storage materials. They also often use 3D printing the lab to create special fittings or devices that they use in research.
NGSS Standards
| Standard Number | Standard text |
| 4-PS3-2 | Make observations to provide evidence that energy can be transferred from place to place by sound, light, heat, and electric currents. |
| 4-PS3-4 | Apply scientific ideas to design, test, and refine a device that converts energy from one form to another.* |
| MS-PS2-3 | Ask questions about data to determine the factors that affect the strength of electric and magnetic forces. |
Materials
- 3D Printer with PLA Plastic, 3D CAD Software and Printer Pre-press Software
- Zoonlite Car from Pitsco for Hardware
- Rechargeable battery
- Diode
- ¼ “ Wood Dowels
- Switch
Procedure
- Print out the modules specified in the stl model and following the instructions from you 3D printer.
- Frame- two ¼ “ hardwood dowels provides the strong structure on which the modules can be slid. This allow you have a very short car or very long car with multiple support and extra modules.
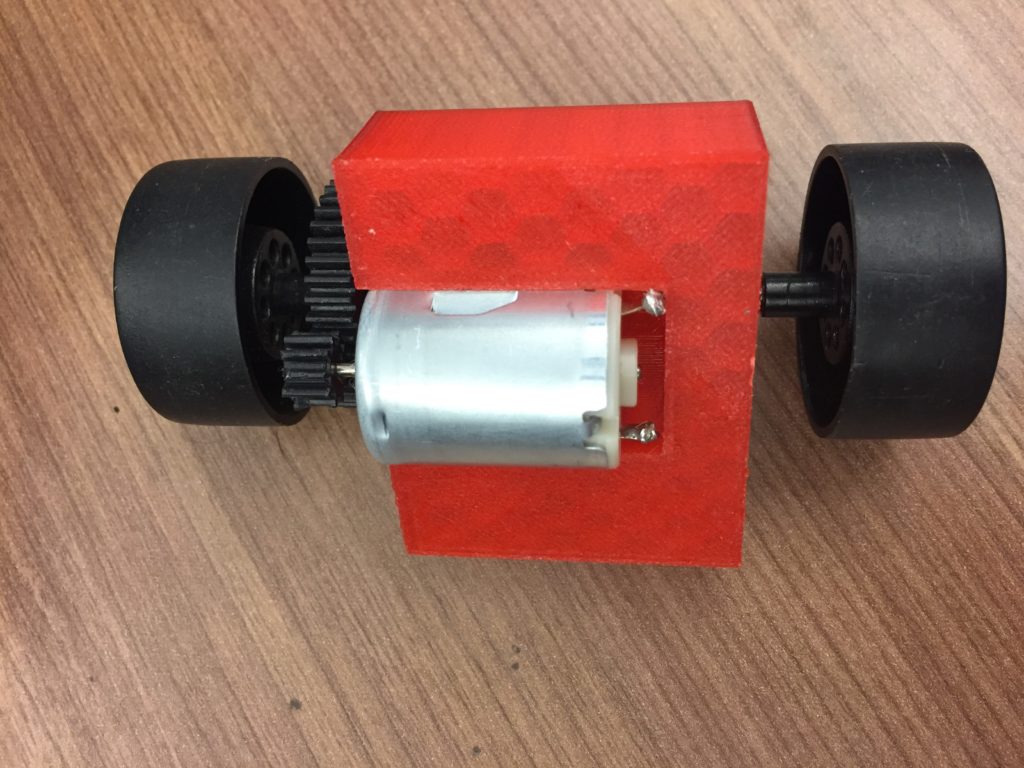
- Front Wheel Module- Provides support and bearing for two whiles and 1/8” metal axel. The wheels, gears, axels and motor are available in a kit from Pitsco Sunzoon Lite Car for $12.75 each. The ends of the two frame dowels press into holes on the inside.
- Motor Module- This has a hole into which the wired motor slides. The motor has a small gear which fits into a large gear on the read axle. To make ours more durable we solder wires on the motor and connected these to rigid bolts. pinched these under a nut and washer on a. Drill a hole top to bottom near each battery terminal, insert a 2” 10-24 bolt i from underneath, add a washer and nut, and pinch the battery wire under the washer and bolt. Student can now connect their solar panel alligator clip to the bolt which will not pull loose.
- Solar panel support module. This slides in the middle on the two dowel. A simple block version can support a solar cell flat with Velcro. A variable angle mount version has a bracket with full rotation for altitude and azimuth so that the panel can be directed for maximum power for each run.
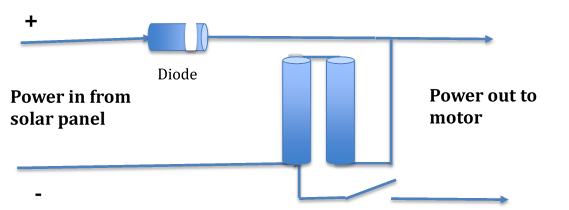
- Battery Module- This contains a double AA battery holder, a diode and switch. Input wires bring power in from the solar panel to the battery or battery plus motor output. The diode prevents the discharge through the panel when the panel is shaded. The switch turns on the motor with battery or battery+solar power. There must be batteries in the holder to make a complete circuit.
- Assembly- Thread the modules you would like to use on to the two dowels. Place a wheel and motor module at each end. Connect your solar panel to the wire or bolts connected to the motor. Place it in the sun and see how it runs!
Steps for Printing in a 3D Maker Space
Below you will find a helpful guide with steps for printing a solar car on a 3D printer. These directions will vary depending on your hardware – software system.
- The first step is to open up whatever 3D printing program is compatible with your 3D printer. Many of these programs can be downloaded online for free. For the purposes of this tutorial, I will be walking through the steps of using MakerBot. My other favorite option is Flash Print, which is also free.
- Make sure your build plate within the software is set to the same size as that of your 3D printer. In Flash Print, the printer type should be listed at the bottom, so you can click and choose which printer you are using.
- Next, go back into your CAD or 3D building program and save all of your files as .STL files. For the solar car designs listed on the Clean Energy Institute website, they are already in this format.
- Once your printing software is open, open all the .STL files you want to print. Depending on the design of the solar car you are making, there could be up to seven pieces that you must fit onto your build plate. Make sure none of the pieces are touching one another.
- For each piece, press “place face on build plates” which is located in the Orient tab (this button may also be labeled “on platform” if you have the older version). Using the x, y, and z rotation buttons, orient each object so the flattest side rests on the build plate.
- Make sure to click the box that says “support”. This will automatically decide where to place scaffolding support so your pieces print well.
- Set the print fill to 15% (standard for most prints).
- Look through the settings and make sure nothing seems amiss.
- Then you should be ready to export your file to a flashdrive or a sim card depending on what your printer takes.
Finally, on your printer, choose the file you just saved and print!
Extensions
Try combining the solar car frame with an attractive exterior that you make out of Styrofoam, paper mache or other technique. Design your own models for gears and wheels.
Resources
Where to get your materials
- Zoonlite Car kit from Pitsco (for wheels, gear, axle, motor and solar cell)
- Diode
- Battery Holder
- Slide Switch
- Mini Solar Car Chassis